Sunday, June 27, 2010

Congratulations Angie "Ironman" Gerber!!

I just wanted to give a shout out to my high school classmate Angie Gerber. She just completed the Ironman competition in Coeur d'Alene, Idaho about 1/2 hour ago! So very excited for her accomplishment today!! Her overall time was 16:13:36! That's 1:30:53 for swimming 2.4 miles, 7:52:11 for bicycling 112 miles and 6:29:40 for running 26.2 miles (a full marathon). Whew, makes me tired just typing those times, lol.

Here's a photo I stole off of one of her friend's Facebook pages. This was taken a couple days before the race. Isn't she cute?


I don't have a photo of her crossing the finish line, but as soon as I can find one to steal I'll add it to this post. :)

Congratulations again Angie!! Like I already said on Facebook, you are one AMAZING woman!!

Sunday, June 20, 2010

Another 40 year old in my life


Well, it looks like another one of my friends has hit the 40 year mark today. My dear friend Alicia is now officially 40 and Fabulous!! I wanted to do a flash back with photos from over the years, but frankly I'm so disorganized that I don't know where anything is. I should have just borrowed Alicia's photo albums, because she's always been on the ball about getting pictures right into albums where they should be unlike me and my totes full of lose photos - yikes! One of these days (she says yet again) I'll get all of those photos organized and maybe I'll do a special post with some of the "best of" shots of Alicia for all to see. ;)

For now, I'll just say again "Happy Birthday my Dear Friend"! Thank you for being such a great friend and "sister". Thank you for being such a great "Aunt" to my kids. It's always so fun to be around you. You make me laugh and I still think you should write a book some day about all of your adventures and those crazy, funny dreams you have (wiener dog babies come to mind as I type this), lol!

Thanks for letting us celebrate with you last night and as I said in my card, I can't wait to see what the next 40 years brings! Love you!

Monday, June 14, 2010

Beautiful day on the coast

This photo makes me laugh. We went to the coast this weekend to watch cousin Shawna graduate from Nursing School. It was such a beautiful day there, Shawna and I took a spin in her new Jeep later that afternoon. I became a one armed photographer to capture the moment.

Tuesday, June 1, 2010

Jackpot June - the CTMH Goodie Box Promotion is back!

JACKPOT JUNE MEANS DAILY DEALS!
Hit the jackpot and win free products OR grab loaded goodie boxes at 50% off or more. Enjoy two types of deal days in June!


On goodie box days… you can purchase one box filled with popular products at 50% or more off retail value! Each goodie box day will feature different surprise items, so you can score a wide variety of current and recently retired products.

On jackpot days… 5 products will be offered for sale at discounted prices. One of the 5 products is the mystery jackpot item for that day, but we’re not telling which—exciting, isn’t it! If you happen to order the mystery jackpot item, we’ll reward you with one or more FREE Close To My Heart products, with shipping included on the free items! If you purchase all 5 products, you’re guaranteed to hit the jackpot! There’s no purchase limit—if you order multiple secret jackpot items, we’ll send you the same number of free items.

These special offers include discounted shipping/handling and are only available on a MyCTMH® website - click here to shop from my website. Once on my website, follow the "Shop Online" link to "Jackpot June" (located on the left side bar). Check back every day for the latest offer. Email me with any questions at kandi@myctmh.com.

Here's the "fine print":
* Offer valid June 1–July 1 at 8:00 am (MDT), on MyCTMH websites only. New deals are posted each day at 9:00 am (MDT). To be eligible for discounted prices, your order must contain only Jackpot June items. Visit facebook.com/closetomyheart or closetomyheart.com to see what the mystery Jackpot item was for the previous day. Offers are while supplies last.

Monday, May 24, 2010

May Card Workshop (yes, I am still here)

I know, I know, it's been forever since I updated this blog. I don't know what's gotten into me, but it just dropped off the top of my priority list a while back and has stayed at the bottom.

I have lots of catching up to do and I've been taking photos along the way, so hopefully I'll get some time to sit down and post about what's been going on since my last post back on March 28th - yikes!

For today though, it's only a crafty post. I know, not the most exciting for some readers, but for my fellow crafty peeps, I know you all can appreciate it. :)

I had a fun workshop yesterday with 6 lovely ladies in attendance and I actually got on the ball and took photos of my cards right after they left, while I still had some good daylight to use. I still haven't posted my April workshop photos, so I'll have to work backwards on another post as today's post is only the 5 cards from yesterday. So, without further ado...

Card #1:
This card was made using the new "Splendor" paper pack and the new stamp set called "Hot Diggity". We embossed the frog and added a fun paper pleat (we did this on a bird card a couple months back). This is a card I created for a card swap I participated in recently. I guess I wasn't tired of it after making 26 of them for the swap, so I decided to do it again. :)


Here's a closer shot of the frog so you can see that he's embossed. This stamp set has some really cute images, can't wait to use it some more.


Card #2:
This was a fun, masculine Father's Day card that I CASE'd from a fellow consultant, Beth Ivanic. I've made these little folded paper shirts in the past, but I loved the layout that Beth used on her card, so I just had to do the same. The shirt was made from one of the patterned papers in the "Cherry-O Creative Basics" paper pack. I just love it and it's very versatile. One of the other cards we made uses another pattern from this same paper pack.


Here's a little closer view of the shirt. Isn't it adorable? I love the added bitty brads as buttons. This could easily be a birthday card too, just stamp "Birthday" at the bottom in lieu of "Father's Day". The hemp adds a little extra masculine touch too.


Card #3:
Here's the other card I was talking about that uses the "Cherry-O Creative Basics" paper pack. This is a fun baby card I also created for the card swap I was in recently. I also made 26 of these. I don't think it was the most favorite card of the day yesterday because of having to line up the stamped images, but it was doable especially because the stamps are clear and you can see where on your paper the stamp is going to land. Gotta love Close to My Heart Acrylic Stamps!


The Cherry-O Creative Basics paper pack also comes with 4 yards of this great velvety ribbon - love it! The new 1 1/4" paper punch came in handy for punching out the tag after we stamped it.


Card #4:
This was my favorite card of the day. I CASE'd this card from a fellow consultant named Tina Dupin. She participated in another new product swap that I participated in and she designed this great card. Her card used a different paper pack and I was already using that paper for another card in this workshop, so I switched the paper up. The paper we used is called "Unforgettable" and the stamp sets are "Aspiration" (which goes great with this paper pack) and "State of Mind" (which has several definations to choose from).


Card #5:
For the last card of the day I wanted to show off our new Clear Cards. These are really fun. You get 8 in a package, 4 square and 4 scalloped circles. I think everyone had fun making this card. For this card we used the new "Cherry-O" paper pack and the stamp set called "You're Sweet". This paper was a definite favorite of the day. We also made the little flower on the front using the new 1 1/4" Circle punch again and following the directions from page 13 in the idea book. When you're looking at your Idea Book next time be sure to pay attention to the great tips and tricks that are located throughout - what a great resource!

So here's the front of the card.


Here it is opened up so you can see the area where you would write your own little sentiment to someone.


Here's a little closer look at the folded flower and I'm not sure if you can tell from this photo, but we accented the cherry's polka-dots with the new "Stardust Glitz Glimmer Glue".


Well, that's all for now. If you have any questions about any of the products used or you'd like to attend a workshop in the future or you haven't got your latest copy of the new Summer 2010 Idea Book, leave me a comment or send me an email to kandi@myctmh.com

See you soon!

Sunday, March 28, 2010

Sparkle!

Yesterday afternoon I had the opportunity to spend some time in my craft room with my good friend Linda and our new friend Sparkle. Sparkle used to be a Close to My Heart consultant and that's how I originally found her blog. I've been following her blog for a while now and it was fun to get to meet her in person.

Sparkle lives in the Seattle area now, but grew up in Portland. She was down for the weekend because she's taking a Copic Certification class today. Copic's are the type of marker she uses to color her images with. She's a fantastic card maker and her coloring skills are what drew me to visit her blog daily. I want to color like her when I grow up, lol.

Here are the three of us thanks to Mateo the photographer.


* Sorry guys, this is the only photo I didn't have my eyes all the way closed in - good grief!

Well thank you Linda and Sparkle! I hope you both enjoyed our time together and Sparkle, maybe we'll meet again in the future. Thanks for coming over and hanging out with us! :)

Wednesday, March 24, 2010

March Card Workshop - yes, another workshop....

OK, I know some of you "lurkers" reading this are not interested in the craft stuff I do and only want to see photos or hear stories of my goofy children, but too bad you're gonna have to wait for another post, heh heh.

I had my March Close to My Heart monthly card workshop this last weekend. I only offered it on Sunday this time around as I figured there wouldn't be a huge turnout because of Spring Break. I did have 3 lovely ladies join me on Sunday and we had a good time and actually finished on schedule. I thought I'd share the cards/projects we did.

This month's workshop didn't really have a theme. It was kind of Easter, Spring, whatever. Basically a mish mash of cards/projects. So here they are...

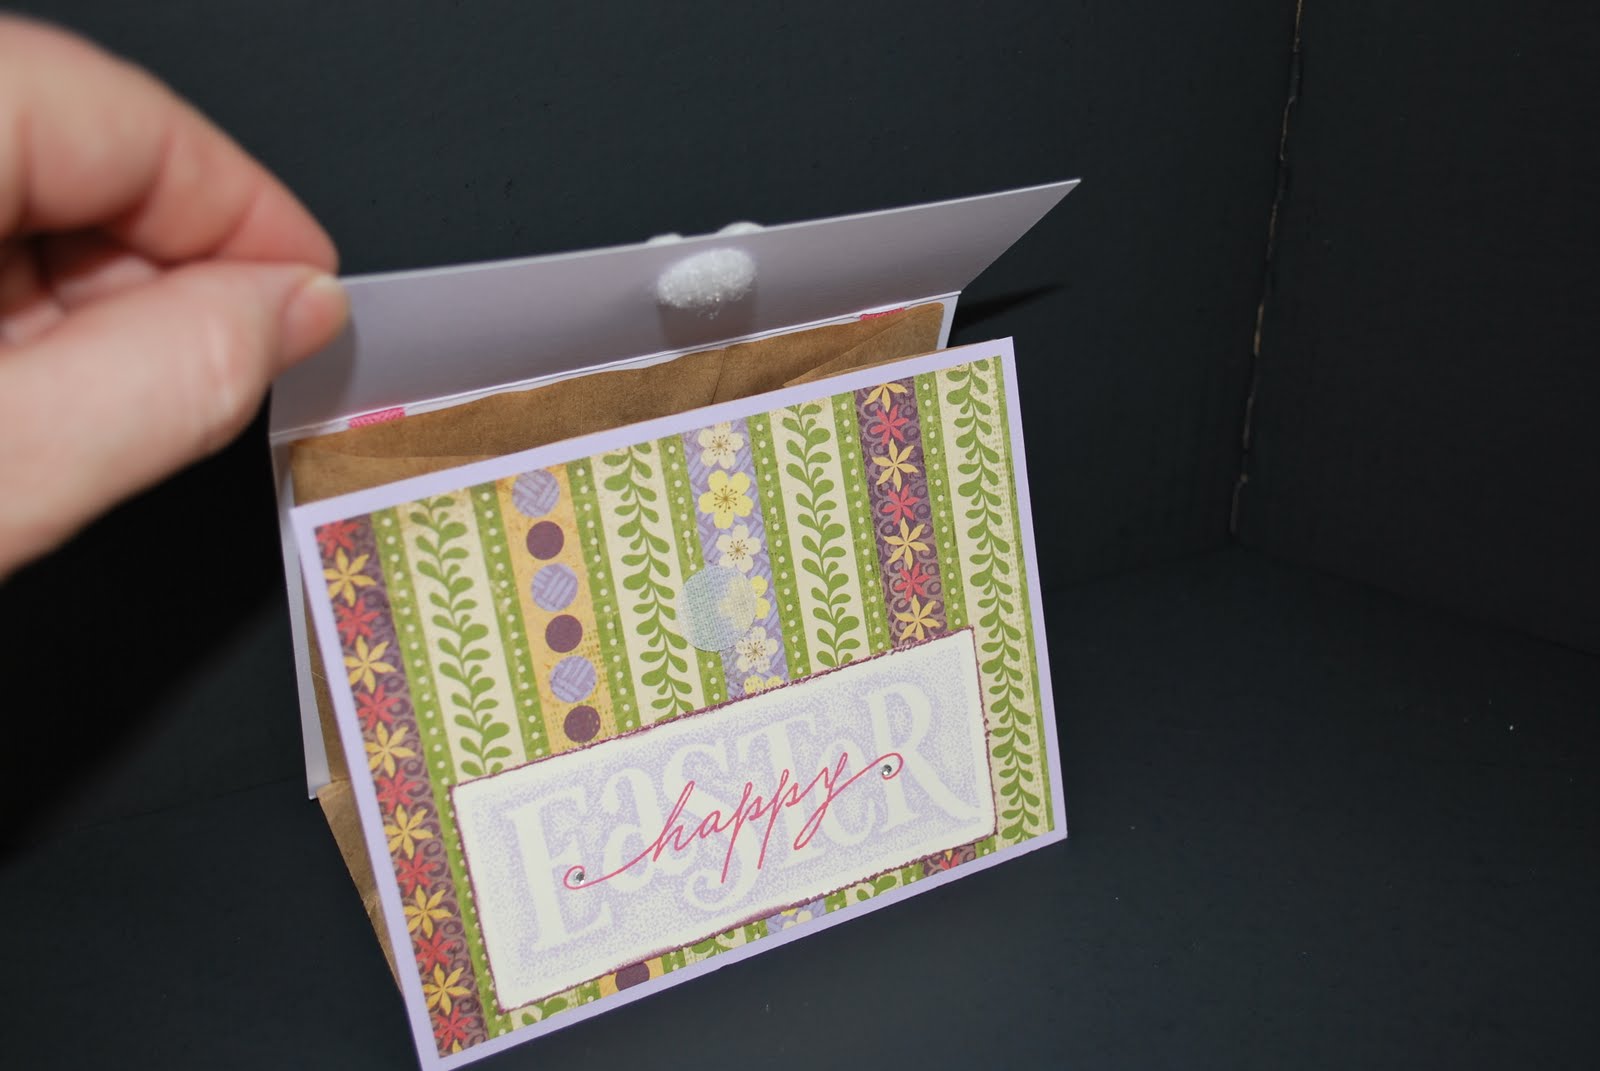
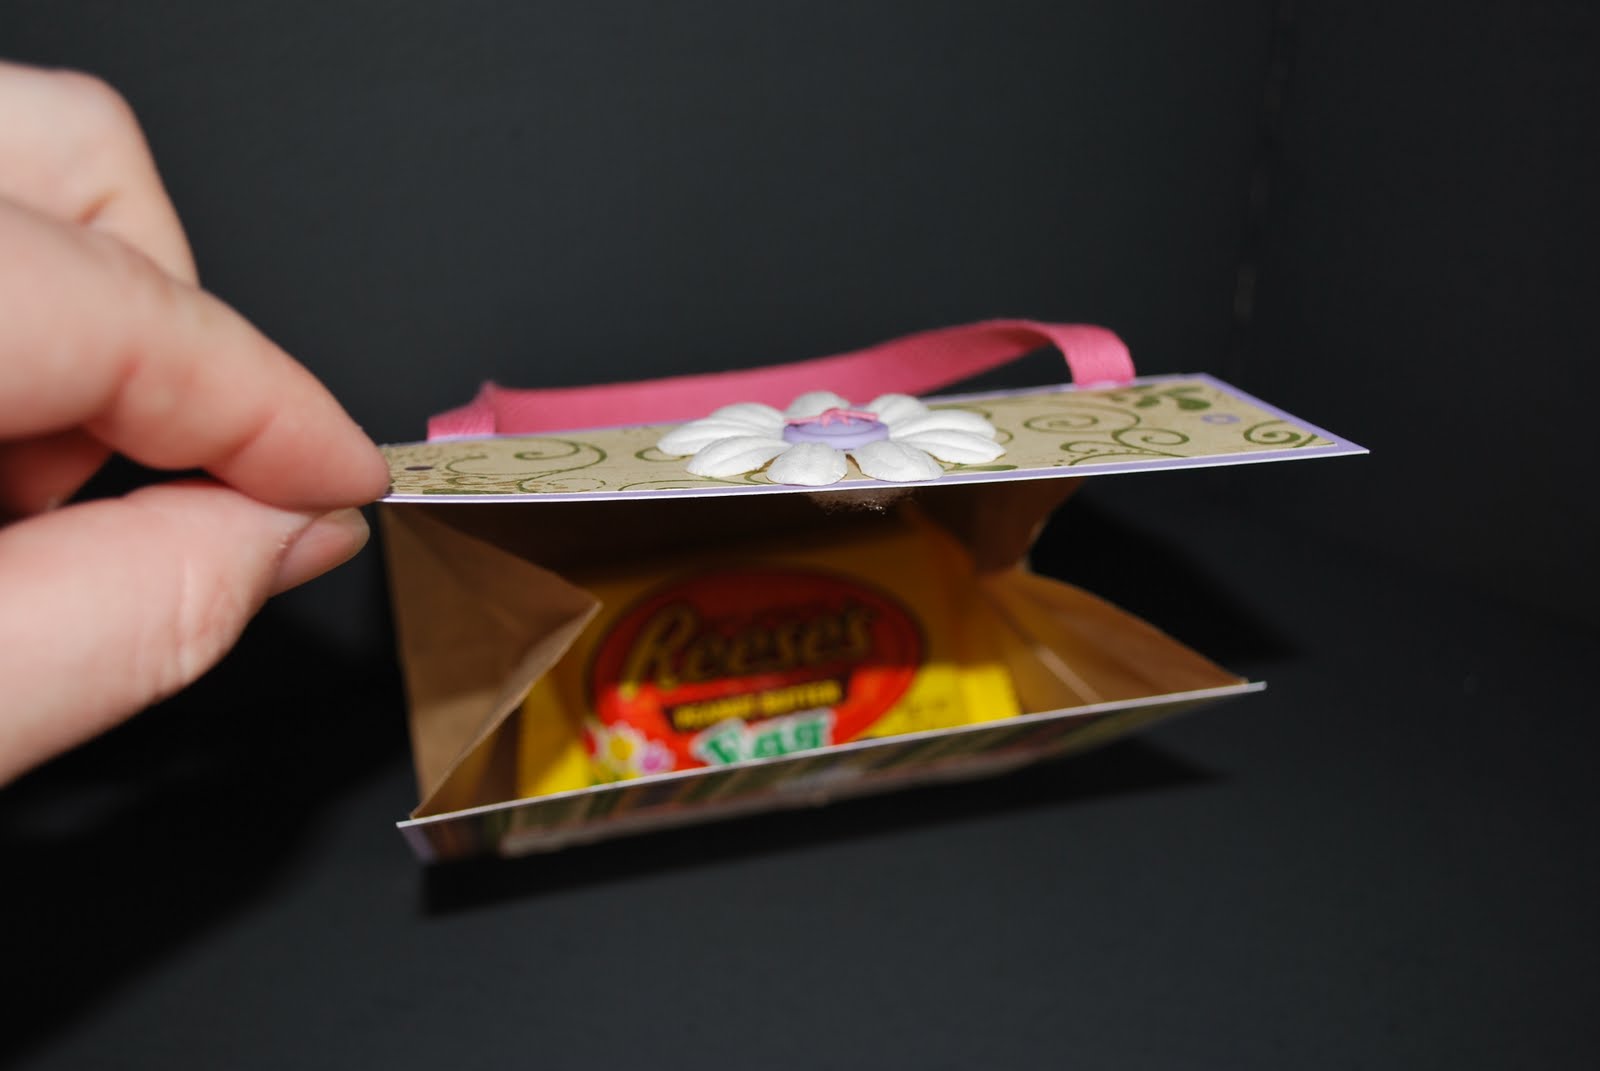
The first thing we made was this cute little "purse" made from a brown paper lunch sack.


How cute is that? My friend Linda saw that another consultant had posted one on the consultant artwork boards and she thought I should give it a try. Good call Linda! I think everyone thought it was really cute. The original post with directions came from here. I'll definitely be making more of these in the future.

Items used:
Stamps -
Eastertime
Paper -
Bella Level 2, Amethyst cardstock
Ink -
Amethyst, Hollyhock, Smokey Plum
Accessories - Hollyhock Ribbon, Spring Craft buttons, Bitty Sparkles, Blush Waxy Flax, Big Pinks Just Blooms paper flowers
Other - Brown paper lunch sack, Velcro tab

The next card we did involved a lot of folding.


Pretty cool huh? At a CTMH multi-unit consultant meeting back in January, a fellow consultant named Sharon Chatterton taught us how to make a card very similar to this. Sharon's folded area was in the shape of a circle. Another fellow consultant, Debi Davis was at the same meeting and has since altered the pattern to elongate it to become an oval.

In the oval shape this could look like an Easter Egg. It also has the look of a cross for Easter. I received Debi's directions and actually copied her card exactly, down the same paper pack. I think this Caboodle paper is so fun. You'll be seeing a lot more of it in photos of next month's workshop.

Items used:
Stamps -
Springtime
Paper -
Caboodle Level 2
Ink -
Cocoa


This next card was a bit of a "cheat". It's called a Double Diagonal Pocket fold card.


I had made this card with my friend Linda at that January multi-unit consultant meeting in January. We signed up to teach a project and this is the card we made. I actually had extra kits left over and the stamping and most of the prep was already done, so it was basically just an assembly project for my gals. It's a fun fold to learn and if you've been following my monthly workshop results, you saw it used in my January "Valentine" workshop.

Items used:
Stamps -
Dream Wishes, Say It In Style
Paper - Emporium Creative basics, Colonial White & Twilight cardstock
Ink - Vineyard Berry, Twilight
Accessories -
White Daisy Just Blooms, Pewter Designer Brads

This next card is one that I created for a monthly swap that I'm involved in with my local CTMH unit. In that swap each person receives the same piece of paper and accessory and the next month we see what we all came up with. It's fun to see all the different designs.


Isn't this butterfly fun? I wanted to show the "rock-n-roll" stamping technique again this month, so that's how the butterfly got it's 3 different colors. We also did some masking to get that polka dotted background around the butterfly and sentiments after they were already on the card base. Tricky!

Items used:
Stamps -
Embrace Life, Say It In Style, Argyle Background (retired)
Paper -
Bella Level 2, Colonial White cardstock
Ink -
Creme Brulee, Hollyhock, Smokey Plum
Accessories - Bitty Sparkles, Colonial White ribbon, Colonial White Waxy Flax, Book Smart Dimensional Elements

And last but not least is my favorite card of the day.


Isn't this little bird just adorable? It's called "A Tweet". It's one of CTMH's new low price stamp sets, only $7.95, what a deal! I've been wanting to try that box fold technique with paper for a long time and with a little trial and error, I've now got the measurements down. And how pretty is that ribbon? I just love that color, called Creme Brulee.

Items used:
Stamps - A Tweet, Noted Backgrounds

Papers - Veranda Level 2
Ink -
Juniper, Cocoa
Accessories -
Creme Brulee ribbon, Basic Craft Buttons, Metal Brad Assortment (bitty size)

In case any of the projects strike your fancy, I've listed the items used in each of the projects. I've added a link to the products that are currently available. Just click on the word and the link will take you directly to my website where you can purchase items 24/7. If you have any questions, just leave me a comment and I'll get back to you.

Thanks for visiting!

Friday, March 19, 2010

44 Years!

Happy 44th Anniversary Mom & Dad!!


You were such babies in this photo!


Congratulations on a wonderful marriage! Thank you for being such great role models to me my whole life! I love you very much. Enjoy your day!!

Wednesday, March 17, 2010

February Card Workshop

Oops, it's the middle of March already and I've been promising people that I'd get photos posted of the cards we made in the February card workshop, so I guess I'd better get to it. The theme last month was "Birthday", so we made a variety of 5 Happy Birthday cards. Who can't use some birthday cards in their stash?

As always I had some inspiration from fellow consultants. I loved this first card so much when I saw it done by Connie Macfarlaine I just had to duplicate it for my workshop peeps. The workshop attendees had the option of 3 different colors of cardstock, markers & matching buttons: Crystal Blue (shown here), Blush or Buttercup. The card looked so cute in all the different colors, I should have taken photos of every one's all together.


Items used:
Stamps - Smiles, Happy Birthday
Paper - Black, White Daisy & Crystal Blue card stock

Ink - Markers (Crystal Blue for this one), Black Stamp Pad
Accessories - Winter Cozy buttons, Designer Ribbon - Black , Black Waxy Flax.
Tools - Paper Piercer

This second card has been in my "inspiration" file for a long, long time. I originally saw it done by a really talented consultant named Lisa Stenz. I've always loved everything she does, so I have lots of photos of her cards & projects in my file. Isn't that little birdie cute and I love to add those bitty sparkles to lots of my cards. They're such a great deal at $2.95 for 100!


Items used:
Stamps - Bird Basics, Gracious Greetings, Key to My Heart (retired)
Paper - Chocolate Textured Cardstock (retired), Caboodle Level 2
Ink - Sorbet & Chocolate Stamp Pads
Accessories - Bitty Sparkles, Liquid Glass


I came up with this next card very quickly on the morning of my card workshop (shhh, don't tell anyone, lol). I just found a pattern in the "Originals Card Confidence" book and followed the cutting guide, easy peasy. This Topstitch paper is so cute and I love the faux stitching on the "Togetherness" stamp set.

I also wanted to do a little preview of March's Stamp of the Month called "A Little Everything". It's a very versatile stamp set, but it's only available during the month of March, so you've got to make sure and get it before March 31st. Stamps of the Month are great too because you have the opportunity to get them at a discount or even for FREE - what a deal!


Items used:
Stamps - Togetherness, A Little Everything (March SOTM)
Paper - Chocolate Textured Cardstock (retired), Topstitch Level 2
Ink - Chocolate Stamp Pads


For this next card we used one of my favorite card patterns called a Criss Cross Card. They're a fun alternative to the standard folded card. With this pattern you write your greeting on the little insert. We used the fun Caboodle paper again and attached a "Tiny Tab" on the pull out insert, too cute! We even stamped on the twill ribbon, how fun!

Here's the card all together.


Here it is with the Insert pulled out.


Here's a closer look at our stamping on the twill ribbon.


Items used:
Stamps - Somethin' Special
Paper - Colonial White & Sweet Leaf Cardstock, Caboodle Level 2
Ink - Sorbet & Crystal Blue Stamp Pads
Accessories - Tiny Tabs, Twill Ribbon


And last but not least, our final card was a fun, colorful "Joy Fold" card using the new "You Rock" paper pack. I hadn't done much with this paper yet, so it was exciting to give it a try. My good friend an fellow consultant, Kim Ouimet, had done a very similar joy fold card using this paper for a swap we participated in, so I took inspiration from her.

Here's the card shown from closed to all the way open. On a Joy Fold card the front flap tucks under a button or some other embellishment to stay down. This "You Rock" stamp set is a lot of fun too. We random stamped the splatters and music notes (in second generation ink) on the front of the card to make our own design.


How do you like the guitar? We Liquid Glassed the heck out of that thing. I love Liquid Glass!


Items used:
Stamps - You Rock, Happy Birthday
Paper - White Daisy & Outdoor Denim Cardstock, You Rock Level 2
Ink - Indian Corn Blue, Outdoor Denim & Smokey Plum Stamp Pads
Accessories - Clear Buttons, Indian Corn Blue Waxy Flax (retired), Liquid Glass


During the boys' birthday party the following weekend I knew I was going to see my good friend Alicia's daughter Abigail, who had just turned 11. I thought this You Rock card would be perfect for holding a gift card, so I made another one and this time personalized it with her name (done with the Delightful Alphabet set) and added the gift card on the inside flap. I even decorated the envelope to match. Isn't this paper just perfect for that iTunes gift card?


And speaking of gift cards, one of Mateo's classmates (Savanna) invited him to her rollerskating birthday party back in February. Man, I'm so far behind on my posting. I still have to put the photos and videos up from that, not to mention my own children's birthday events - yikes! Anyway, back to my story, so Mateo picked out a gift card for Savanna and I thought it would be fun to "wrap" it in a bag-a-lope. Remember that from the Valentine's card workshop? Click here to see.

Here's how her bag turned out.


Check out the cool gift card from target. When you push the button on the front it lights up. Target has some very cute gift cards I must say. Hopefully Savanna liked it.


Here's a picture of Mateo and the birthday girl. Isn't she just beautiful? I think Mateo should marry her, lol.


Mateo's best friend Alex was also invited to the party. Here they are, the first time on roller skates for both of them.


Whew, if you made it all the way to the end of this post, thank you! I know it was a long one. Now I'm off to design the cards for my March workshop, this Sunday. I'd better get busy! Thanks for stopping by!